Test Harness
The TOTP MCF plugin comes with a test harness which will assist developpers in familirizing with the flows that need to be implemented in order to integrate TOTP authentication in the target online application.
Pre-requirements in order to run the test harness are:
- A dekstop computer running a recent version of Windows.
- JRE 11 pre-installed.
- Ability to execute the “java” command.
The test harness GUI application can be started from the commandline using the “java” command. Needs to be JRE 11 or newer, was only tested with JRE11.
Then run this command:
java -jar TOTP_MCF_Test_Harness-1.0-SNAPSHOT-win.jar
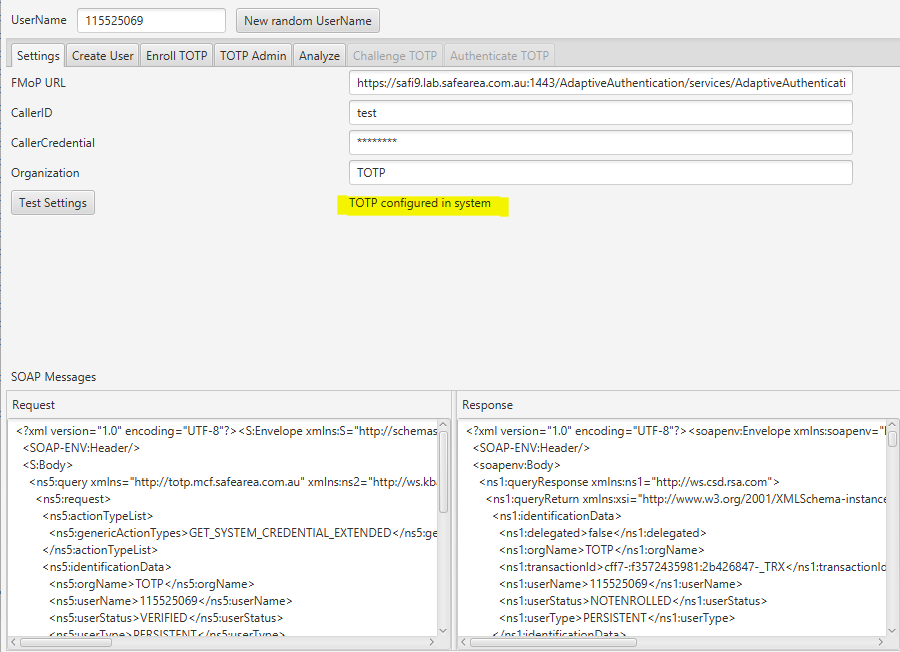
Make sure the details of your FMoP environment match the details shown in the settings tab. Update details as required.
After hitting the “Test” button, if the connection is successful and TOTP is detected in your system, the message shown in yellow will appear.
Review the SOAP messages in the bottom part of the window, no errors should be appearing in the response message.
At the top of the window you’ll notice the “New random username” button which allows you to change the FMoP username to be used for testing. Alternatively you can enter a specific username in the text field.
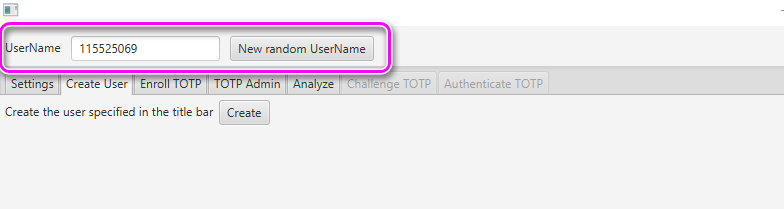
The first step involves creating a new FMoP user to which the TOTP instance will be provisioned. The message highlighted in yellow will appear once the user has been created.

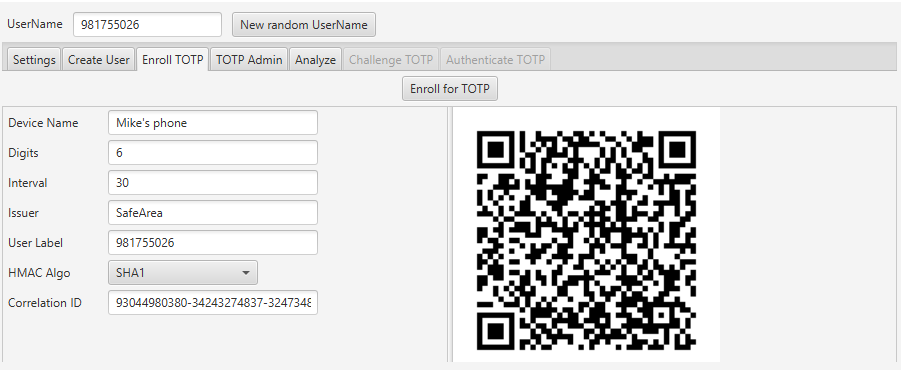
In the Enrol TOTP tab you can generate a QR code to be scanned with a mobile device, to enrol for a TOTP authenticator instance. Depending on configuration settings, a user can enrol for multiple instances, on different mobile devices.
After setting parameters as required, click on the “Enrol for TOTP” button. A QR code should appear in the application, which will need to be scanned by the authentication application installed on the mobile phone.
If no QR code appears then check the SOAP response message for errors.
Go to the “TOTP Admin” tab and click on the button shown in this screenshot. In the table one TOTP instance in the “PROVISIONED” status should be returned.

Go to the “Analyze” tab and the trigger an analyze request for the event type that will return a challenge response for the TOTP authentication method. The text highlighted in yellow will appear if the activity is to be authenticated with TOTP.
If the expected response is received, the Challenge and Authenticate tabs will be unlocked.

This call initiates the step-up authentication cycle.
Click on the button to trigger the Challenge API call.
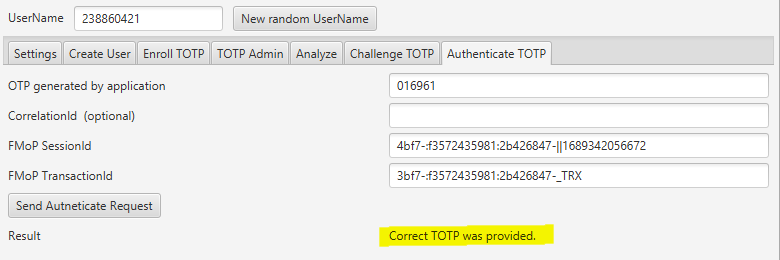
Then go to the “Authenticate” tab and enter the OTP generated by the mobile application. Then click on the button to send the analyze request.
If the correct OTP is entered, the message highlighted in yellow will be shown.